Processes #
A Process is a collection of Extract Transform Load (ETL) tasks. Each Process consists of Steps that define a set of smaller ETL tasks that we call Modifiers. For automation purposes, Processes can be scheduled to be run at a specified time (e.g. once a month, four times a year, every 4 hours, etc.)
Scheduling uses expressions that are similar to those used in the Cron utility.
Processes List #
Clicking the Processes button in the menu will navigate you to the Processes section.

There you will see a list of previously created Processes. Each Process on the list consists of:
- ID - the Process ID,
- Name - the Process name,
- Schedule on - flag whether this Process should be run according to a Schedule
- Schedule (“Timezone”) - The values of the CRON fields; hovering the cursor on the small
 icon will display a tooltip with the information about the
set schedule,
 - Status - the current Status of the Process (
NOT RUN YET,IN PROGRESS,QUEUED,SUCCESS, orERROR); refer to the Statuses for more details, - Actions - additional actions:
 - display Process details section,
 - edit Process settings,
 - copy the specific Process along with its
Modifiers,
 - Export a Process,
 - delete Process,

When you Delete a Process, you delete all Modifiers, Steps, Process Run Logs, and Modifier Run Logs!
Above the Processes List you can find Filters that help you find specific Processes.

You can also click the column names (from ID to Month(s) Of The Year) to sort the
Processes according to those columns.
Process Statuses #
Each Process can have one of the following Statuses:
 NOT RUN YET - the Process has not been run yet,
 QUEUED - the Process is waiting to be run, as other
Processes are being run; only a certain number of Processes can be run simultaneously;
that number can be modified using Configuration Variables,
 IN PROGRESS - the Process has been started but has not yet
finished,
 SUCCESS - the Process has finished successfully,
 ERROR - the Process has failed to finish because of an error;
refer to the Process Run History section for more details.
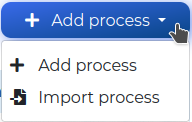
If you want to add a new Process, click the Add process button and choose either to + Add process or to Import process.
Adding a new Process #
This section is the same for editing Process details.
When you click the Add process button, you will navigate to the Create new process section. Here, you must fill in the following fields:
- Name - the name of your Process (Required),
- Description - optional description of the Process,
- Schedule on - flag whether to run this Process automatically according to a schedule; connected with latter fields; enabled by default,
- Minute(s) - Cron Minute(s) - at which minute(s) of the hour
to run a scheduled Process (Required,
0by default), - Hour(s) - Cron Hour(s) - at which hour(s) of the day to run a scheduled Process
(Required,
12by default), - Day(s) of the week - Cron Day(s) of the week - at which day(s) of the week to run a scheduled
Process (Required,
*by default, which meansat every day of the week), - Day(s) of the month - Cron Day(s) of the month - at which day(s) of the month to run a scheduled
Process (Required,
*by default, which meansat every day of the month), - Month(s) of the year - Cron Month(s) of the year - at which month(s) of the year to run a
scheduled Process (Required,
*by default, which meansat every month of the year),
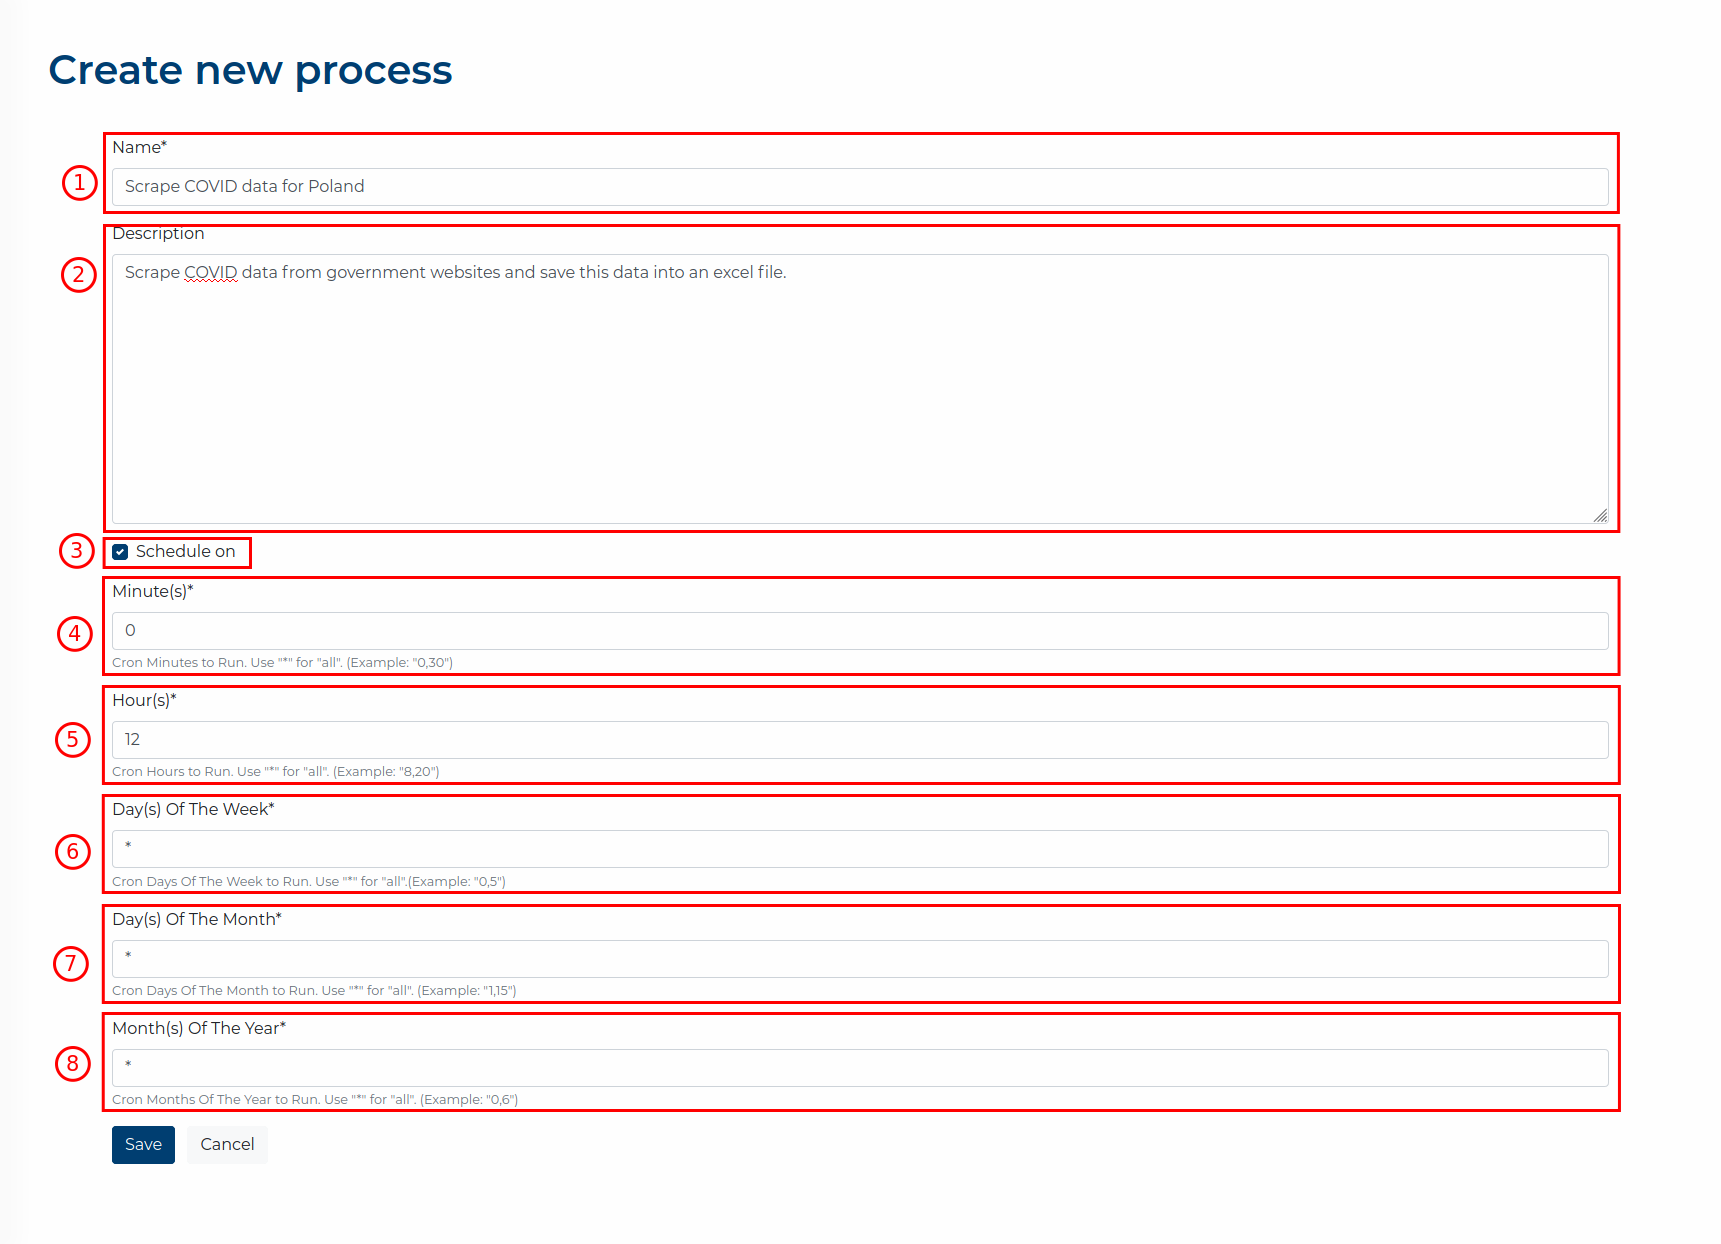
After filling out all the fields, click the Save button to create a new Process, or click the Cancel button to leave without saving.


Clicking any of the buttons will navigate you to the Process list section.
Schedule Configuration #
The Schedule Fields should be set according to the Configured Time Zone
If the Schedule on flag is checked, then filling the Schedule Fields correctly will cause the Process to be run automatically at the configured time. There are five Schedule Fields used to create a schedule: Minute(s), Hour(s), Day(s) of the week, Day(s) of the month, and Month(s) of the year.
The syntax examples can be pasted in the free utility to see exactly when this example will cause the Process to be run.
All the fields can use the following syntax:
*- every (e.g.* * * * *- every minute,0 12 * * *- every day at noon,0 0 1 1 *every New Year’s Day),- used to separate values; do not use spaces between the values (e.g.0 8,20 * * *- every day at 8 am and 8 pm)-- used to make a range of values (e.g.0 4 8-14 * *- at 4 am from the 8th to the 14th every month)/- create step values (e.g.* */6 * * *- every six hours)
Available values for each field:
- Minute(s)
- integers (from
0to59)
- integers (from
- Hour(s)
- integers (from
0to23)
- integers (from
- Day(s) of the week
- three letter abbreviations for days of the week (
MON,TUE,WED,THU,FRI,SAT,SUN; e.g.MON-FRI) - integers for each day of the week (
0-6, with0beingSunday)
- three letter abbreviations for days of the week (
- Day(s) of the Month
- integers (from
1to31)
- integers (from
- Month(s) of the Year
- integers (from
1to12)
- integers (from
Schedule Examples #
To test if all the Cron fields are set correctly, visit the free utility to test your Cron schedule.
The order of fields in the free utility is different:Minutes,Hours,Days of the Month,Months of the Year,Days of the Week
Every Hour #
To run the Process every hour (At minute 0), set the Schedule details accordingly:
- Minute(s) -
0 - Hour(s) -
* - Day(s) of the week -
* - Day(s) of the month -
* - Month(s) of the year -
*
Every Weekday #
To run the Process every weekday at a specific hour
(At 08:00 on every day-of-week from Monday through Friday), set the Schedule details
accordingly:
- Minute(s) -
0 - Hour(s) -
8 - Day(s) of the week -
1-5 - Day(s) of the month -
* - Month(s) of the year -
*
Every Week #
To run the Process on a specific day every week at a specific hour (At 20:00 on Friday),
set the Schedule details accordingly:
- Minute(s) -
0 - Hour(s) -
20 - Day(s) of the week -
FRI - Day(s) of the month -
* - Month(s) of the year -
*
Every Quarter #
To run the Process at the start of each quarter at a specific time
(At 17:30 on day-of-month 1 in every 3rd month), set the Schedule details accordingly:
- Minute(s) -
30 - Hour(s) -
17 - Day(s) of the week -
* - Day(s) of the month -
1 - Month(s) of the year -
*/3
We encourage you to check other Examples and test creating schedules using the free utility. Note the order of fields in the utility is different from those in ETL data_snake.
Exporting processes #
It is possible to export any Process to a file in order to import it in another ETL data_snake instance.
When you navigate to the Export Process section (either through the
Process details section or by clicking the ![]() icon on the Process list section), you will see a form where you have to:
icon on the Process list section), you will see a form where you have to:
- Provide a password for the file (Optional),
- Select whether to also export:
It is recommended to provide a password for the exported file when you include predefined sources and/or targets as the exported information might include database or Fusion Registry 10 credentials, which should not be compromised!

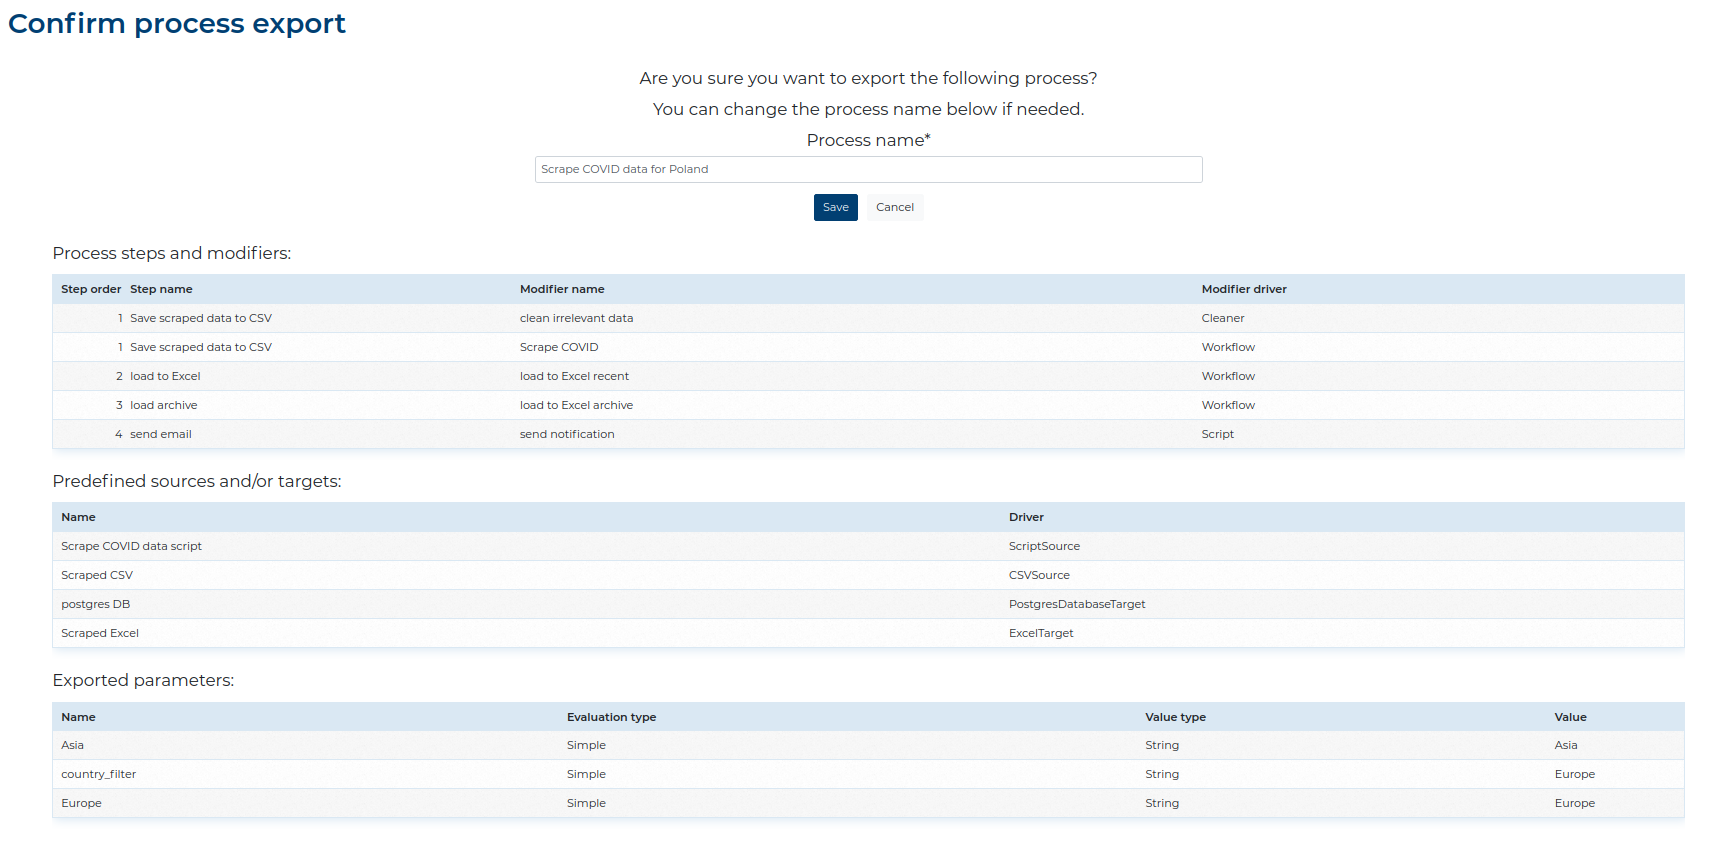
By clicking the Check content button you will be navigated to the confirmation section where you can change the Process’ name and see information about exported Steps, Modifiers and (if selected to include) Predefined sources and/or targets as well as Process Parameters.
You can change the Process’s name. The exported filename will be generated based on the provided Process name.
Importing processes #
You can import exported Process from a file generated in another ETL data_snake instance.
When you navigate to the Import Process section by clicking the Import process button on the + Add process dropdown on the Process list section, you will see a form where you have to:
- Select a file with the Exported process,
- Provide a password to read the file (if needed),
- Select whether to also import:
If you want to import Predefined sources and/or targets or Process Parameters, then they have to be present in the exported file. If they are not present, you can only import the Process by unchecking the three options.

By clicking the Check content button you will be navigated to the confirmation section where you will have to change the Process’ name, if there is a process of this name present in the current ETL data_snake instance. Below you will also see information about all Steps, Modifiers and (if included) Predefined sources and/or targets as well as Process Parameters that will be imported with the Process.

Process Details #
When you click on the Process name or the ![]() icon, you will be
navigated to the Process details section where you can see:
icon, you will be
navigated to the Process details section where you can see:
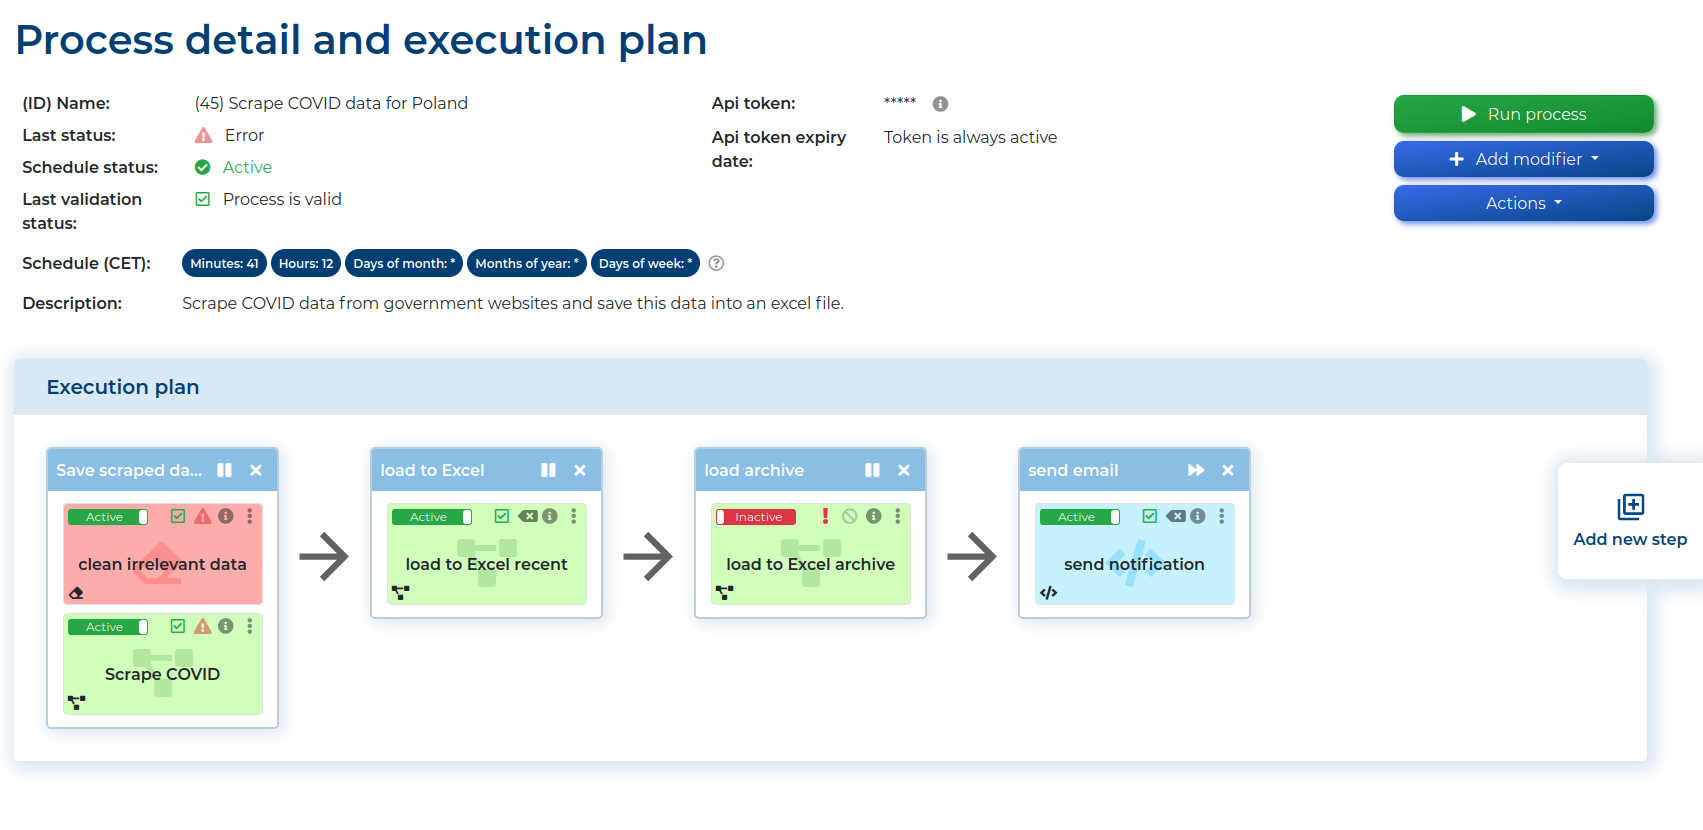
- The Process details:
- (ID) Name - the ID and Name of the Process,
- Last status - the last Status of this Process; refer to the Statuses for more details,
- Schedule status - is the Process scheduled,
- Last validation status - whether the Process was valid when last validated,
- Api token - the Process’s API Token, generated automatically, can only be seen and edited by the system administrator,
- Api token expiry date - the date when the API Token will expire and should be generated again; can only be seen and edited by the system administrator,
- Schedule (TIMEZONE) - the values of the Cron fields; hovering over the
 icon will show a tooltip showing when the Process
would be run according to the Schedule,
 - Description - the Process description, if available; clicking on the Description will show the whole Description,

-
A list of Steps with Modifiers; each element inside a step consists of:
- Active flag - can the Modifier be run; If the flag is unchecked, then the Modifier will not be run, when the Process is run manually or automatically - if it is one of many Modifiers, then it will be omitted; there must be at least one Active Modifier to run a Process,
- Validation - whether the Modifier is valid or not,
- Status - the Status of the Modifier; refer to the Statuses for more details,
- Description - a small icon showing the Modifier’s shortened description; clicking it will open a popup with the name and description of the Modifier,
- Actions - an icon displaying additional actions:
- Run modifier - runs the Modifier without running the whole Process,
- Open modifier - opens the Modifier in edit mode,
- Validate workflow - checks whether the Modifier is valid,
- Show description - shows the Modifier description,
- Copy modifier - creates an exact copy of the Modifier in the same step,
- Export modifier - exports the Modifier to a file,
- Delete modifier - deletes the Modifier,
- Name - the Modifier’s name.
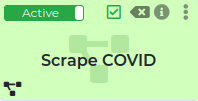
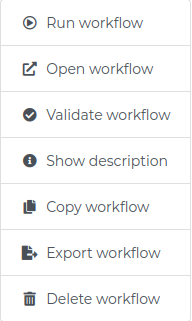
On the left of the list you can find the Add new step button (A) which creates a new empty Step.

- Additional action buttons:
- Run process button (A) - runs the Process,
- + Add modifier - choose a new Modifier to add:
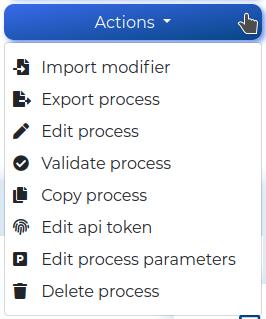
- Actions - other actions:
- Import modifier - allows importing a previously exported Modifier,
- Export process - allows exporting the current Process,
- Edit process - allows modification of the Process settings,
- Validate process - checks whether the Process and all its Modifier are valid,
- Copy process - creates a copy of the entire Process, along with Steps and Modifiers,
- Edit api token - allows modification of the API Token; can only be accessed by the system administrator,
- Edit process parameters - allows modification of the Process Parameters,
- Edit process emails - allows modification of the Process Emails,
- Delete process - deletes the current Process;
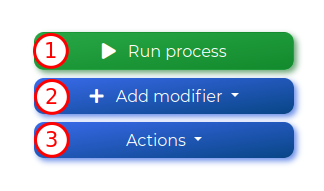
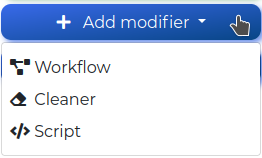
Below is an overview of the whole Process Details section.
Steps #
A Step is a collection of Modifiers that will be run at the same time. To create a new Step, click the Add step button.

To rename a Step, click the ![]() icon. The icon appears when
you hover on the upper part of the step.
icon. The icon appears when
you hover on the upper part of the step.
![]()
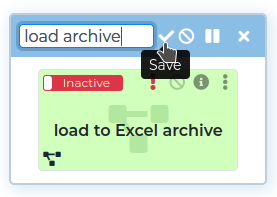
After clicking the ![]() icon you can change the name of the Step.
Hit ENTER or click the
icon you can change the name of the Step.
Hit ENTER or click the ![]() icon to make changes or click the
icon to make changes or click the
![]() icon to cancel the changes.
icon to cancel the changes.
To delete a step, click the ![]() icon in the upper right corner of
each Step.
icon in the upper right corner of
each Step.
Deleting a step will delete all Modifiers inside it.
If you have more than one Step, you can move them by dragging and dropping. Simply click and hold the left mouse button when pointing on the step and drag it to a different place on the Execution Plan.

Be careful when you move or delete Steps because if some Modifiers depend on data Extracted from them, the whole Process might become corrupted or invalid.
In the upper right corner of each Step, before the ![]() icon, you can see one
of the following icons:
icon, you can see one
of the following icons:
- the
 icon, which informs you that this Step and all of its
Modifiers will not be run if any of the Modifiers in previous Steps
causes an error.
 - the
 icon, which informs you that the Modifiers
in this Step will be run, even if any Modifier causes an error.
Marking a Step to continue on fail (![]() ) is useful when you
want to always run a Script when the Process finishes, for example, if it
sends a notification to specific users.
) is useful when you
want to always run a Script when the Process finishes, for example, if it
sends a notification to specific users.
Running a Process #
The Process can be run manually by clicking the Run Process button on the right of the Process details section.

This will open a confirmation view. If there are any Process Parameters created in the Process, then you can check and modify them before running the Process.

To modify a Process Parameter value, click on the
![]() icon to open a window where you can modify the
Process Parameter value. Depending on the Parameter
value type you can see one of the two windows:
icon to open a window where you can modify the
Process Parameter value. Depending on the Parameter
value type you can see one of the two windows:
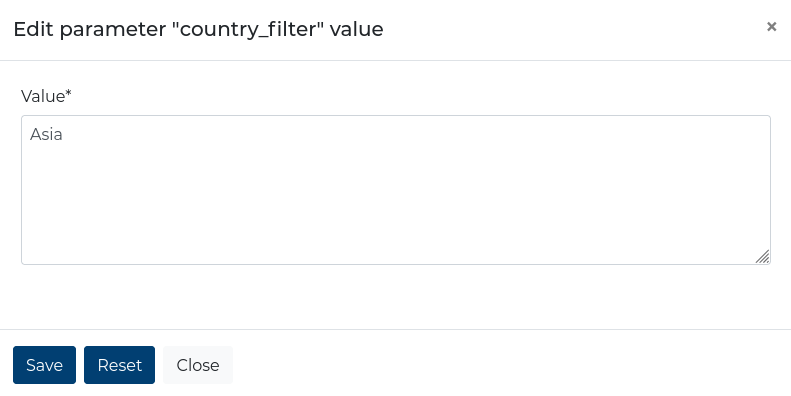
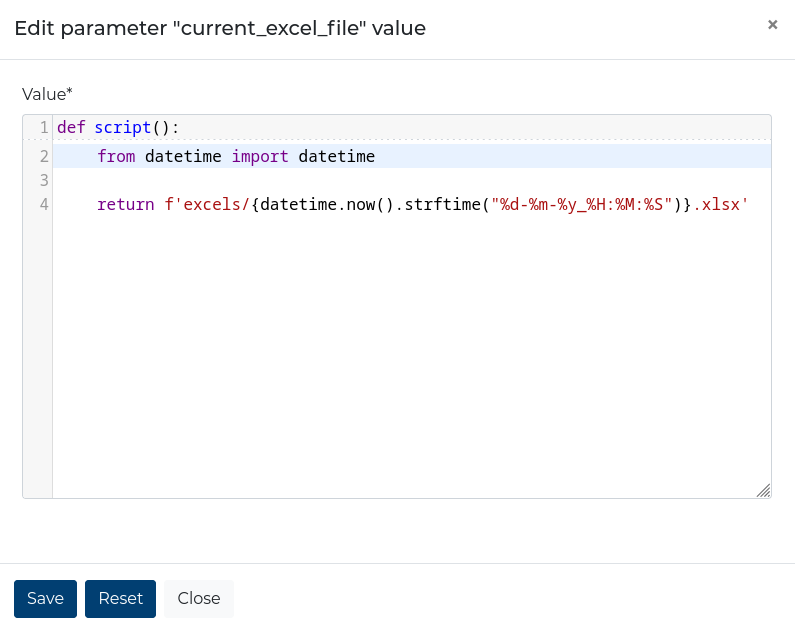
There are three buttons on the window:
 - modifies the Parameter
value and closes the window,
 - after a confirmation prompt, restores the
Parameter to its original value,
 - closes the window, without modifying the
Parameter value; the changes for each Parameter
are stored until you either run the Process or return to the Process Details,
Clicking the Run process button will schedule the Process to be run as soon as possible.

If the Schedule on flag is enabled, the Process will be run automatically
corresponding to the set schedule if the Process Status is not
IN PROGRESS or QUEUED.
Exceptions #
The Process cannot be run if:
- at least one
ActiveModifier is invalid, - the Process Status is
IN PROGRESSorQUEUED, - any of the Modifier Status is
IN PROGRESSorQUEUED, - the Process has no Modifiers,
- there are no valid License Keys.
Every Process has an API Token generated to allow the Process to be run via another application or service.
API Token #
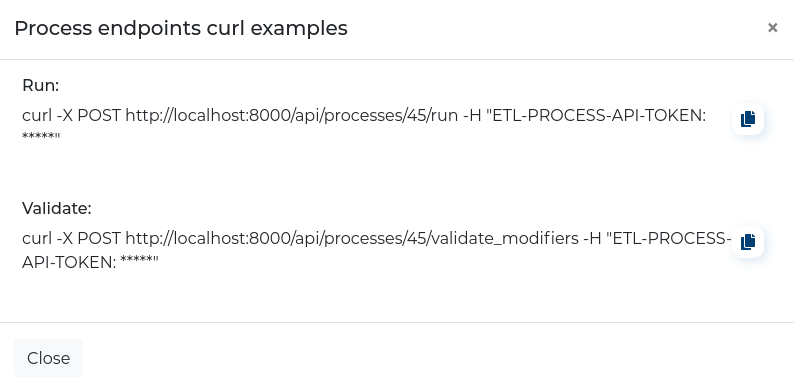
The API Token is used to start a Process remotely or validate it via another
application or service. Clicking the ![]() icon next to the
API Token will open a small popup with an example how to run and validate the
Process remotely (i.e. using cURL).
icon next to the
API Token will open a small popup with an example how to run and validate the
Process remotely (i.e. using cURL).
Run
curl -X POST <URI scheme>://<ETL_SERVER>/api/processes/<ID>/run -H "ETL-PROCESS-API-TOKEN:<API_TOKEN>"
Validate
curl -X POST <URI scheme>://<ETL_SERVER>/api/processes/<ID>/validate_modifiers -H "ETL-PROCESS-API-TOKEN:<API_TOKEN>"
Where:
<URI scheme>- the URI scheme (e.g.http,https) - depends on the server where ETL data_snake software is installed,<ETL_SERVER>is the domain where the ETL data_snake software is installed,<ID>is the ID of the Process,<API_TOKEN>is the API Token for that particular Process.
You can click theicon to copy the whole example command.
Example
Managing API Tokens #
The user with the administration permission can manage API Tokens of each
Process by accessing the Process details section and clicking the
Edit api token button.

This will navigate the user with the administration permission to the Edit API Token
section where they can:
- change the API Token,
- provide an expiry date for the API Token (Optional).

Process Parameters #
Process parameters can be used to modify the behaviour of Modifiers in a Process without having to edit them, by editing the Parameters instead (or supplying them to the run process api view).
A Parameter can be used to either dynamically change the value of any property of a Workflow’s node and any node’s title, or to change the execution environment of script nodes and Script modifiers (because those scripts have access to a dictionary of parameter values).
The Parameter value is determined at execution time. It is a constant supplied by the user when editing the Parameter (in case of simple Parameters) or a value yielded by executing the Parameter’s python script (in case of script Parameters).
There are two types of Parameters:
SIMPLE- the Parameter value is constant, evaluated to the specified Value type (i.e.11for integer,11.0for float,'11'for string, etc.).Script- the Parameter value is yielded by the provided python script.
For a more detailed examples, navigate to the Parameters Use Cases.
To manage Parameters, click the Edit process parameters button.

This will navigate you to the Process parameter list section where you can:
- Recalculate process parameters - will evaluate all parameters and save the calculated value as a cached value.
- + Add process parameter - create a new Parameter,
- View the list of all Parameters created for this Process; each element on the list
consists of:
- (A) the Parameter’s Name,
- (B) the Evaluation type of the Parameter (whether
Simpleor as aScript), - (C) the Value type returned by the Parameter,
- (D) the Value of the Parameter before calculation,
- (E) the Cached value that is the result of the last Parameter calculation,
- (F) the date this Parameter was Last calculated,
- (G) Additional actions that can be performed on each Parameter:
 - display Parameter details section,
 - edit Parameter settings,
 - delete Parameter,
 - calculate the Parameter,

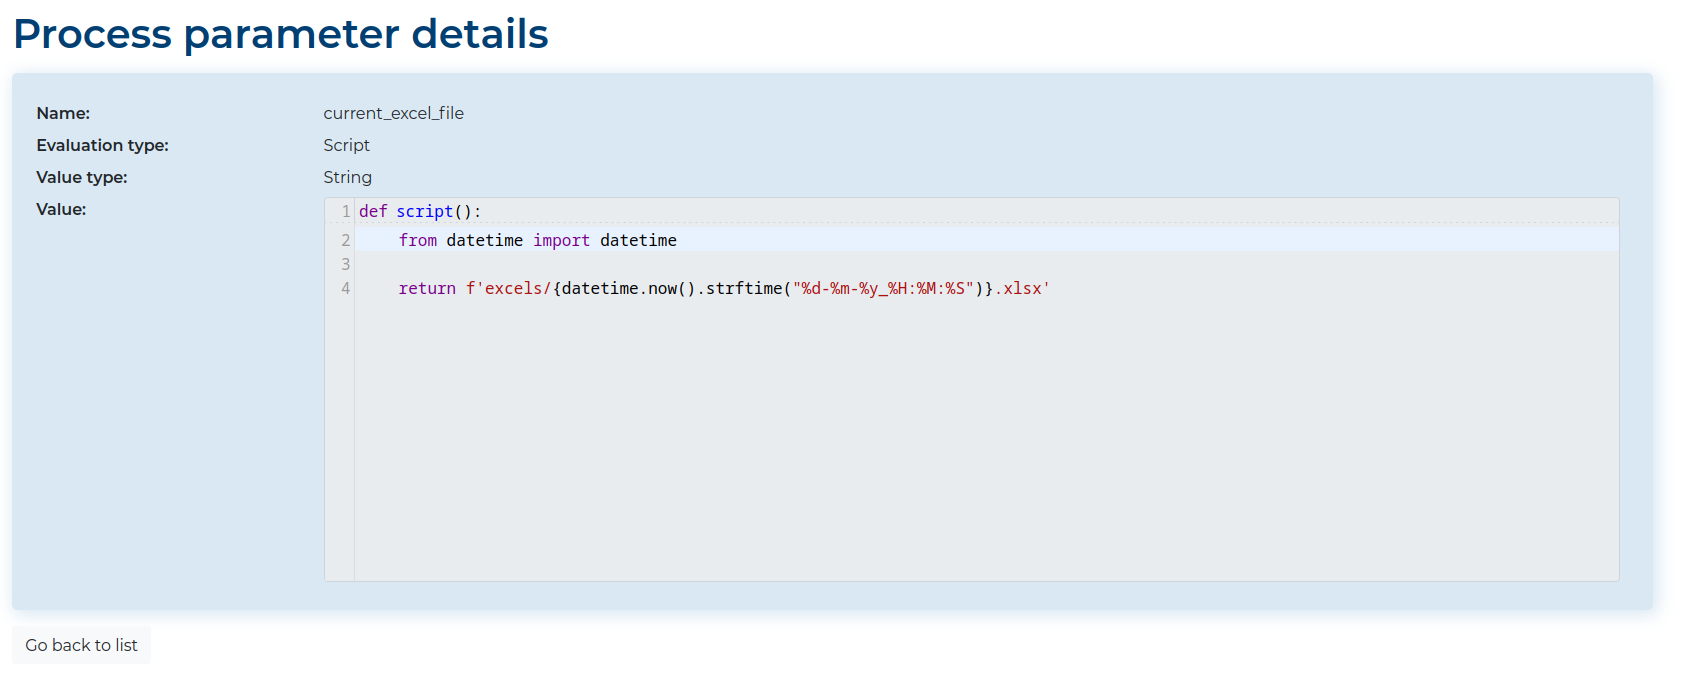
Clicking the ![]() icon will display the Parameter details section
where you can view:
icon will display the Parameter details section
where you can view:
- the Parameter’s Name,
- the Evaluation type of the Parameter (whether
Simpleor as aScript), - the Value type returned by the Parameter,
- the Value of the Parameter before calculation
When you click the + Add process parameter button, it wll navigate you to the create/edit view where you should provide:
- the Parameter’s Name,
- the Evaluation type of the Parameter (whether
Simpleor as aScript), - the Value type returned by the Parameter,
- the Value of the Parameter - depending on the Evaluation type you need to provide either a specific value or write a Python script that returns the desired value.
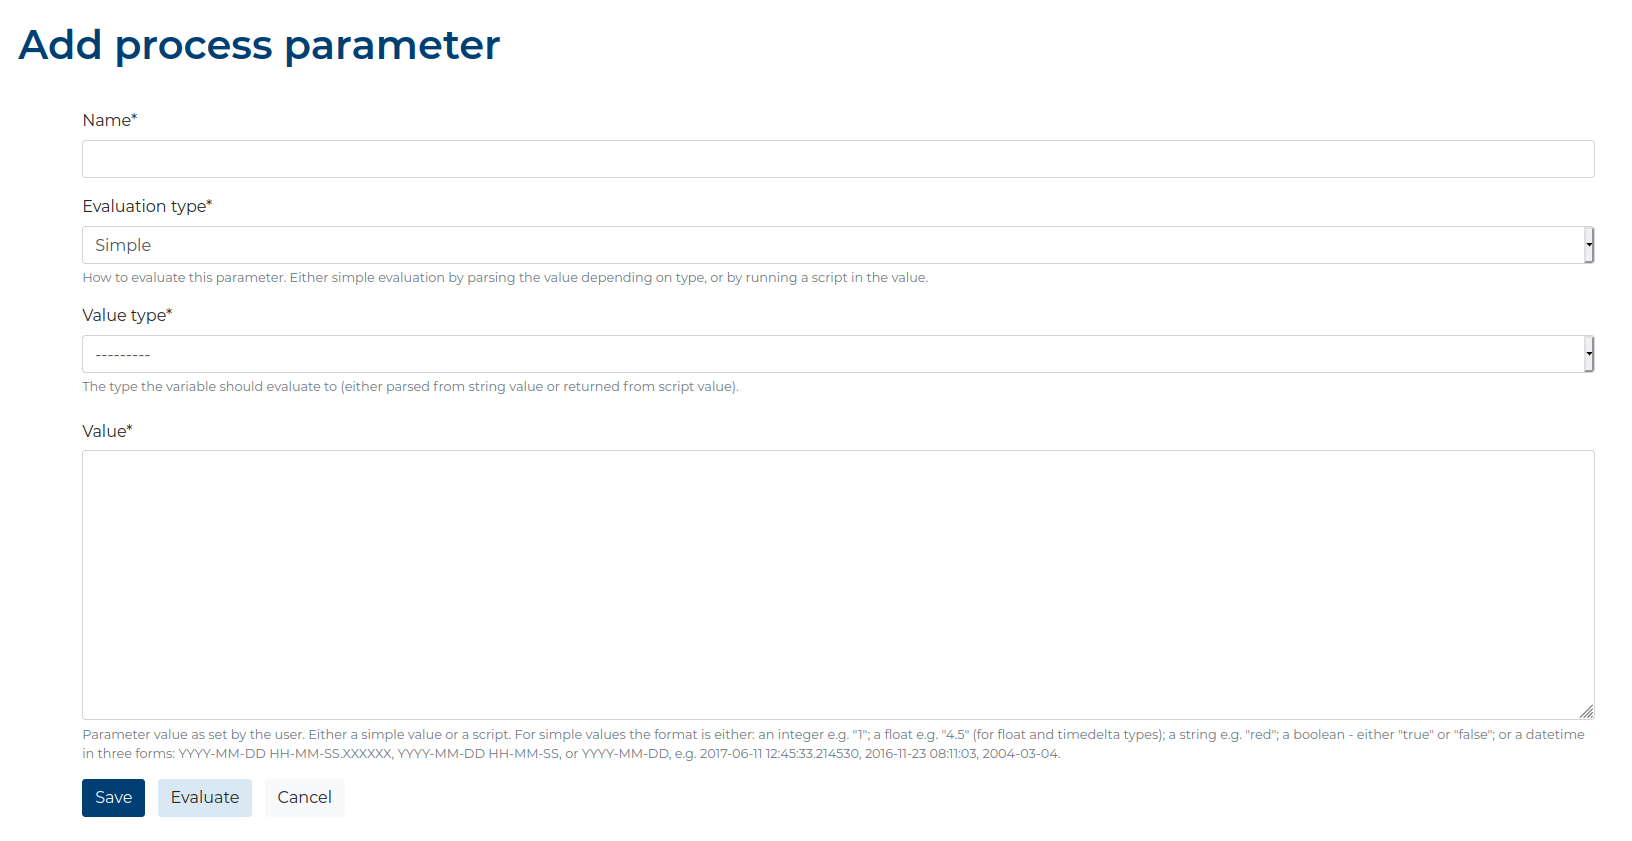
When you edit a Process Parameter you will modify the same fields.
Process Emails #
Process Emails can be used to configure E-mail notifications, allowing a process to send alerts to all addresses assigned to it whenever a process or standalone workflow execution fails.
To manage Process Emails, click the Edit process emails button.

This will navigate you to the Process email list section where you can:
- + Add a process email - create a new Process Email,
- View the list of all Process Email created for this Process; each element on the list
consists of:
- Email Address,
- Additional actions that can be performed on each Email Address:
 - edit Process Email settings,
 - delete Process Email,

Clicking  will open the Add Process Email screen where you can add email.

Process Run Logs #
Every Process that has been run at least once will log the result of each execution. The latest log can be seen by clicking the Status icon. The icon can be found in the Process details.
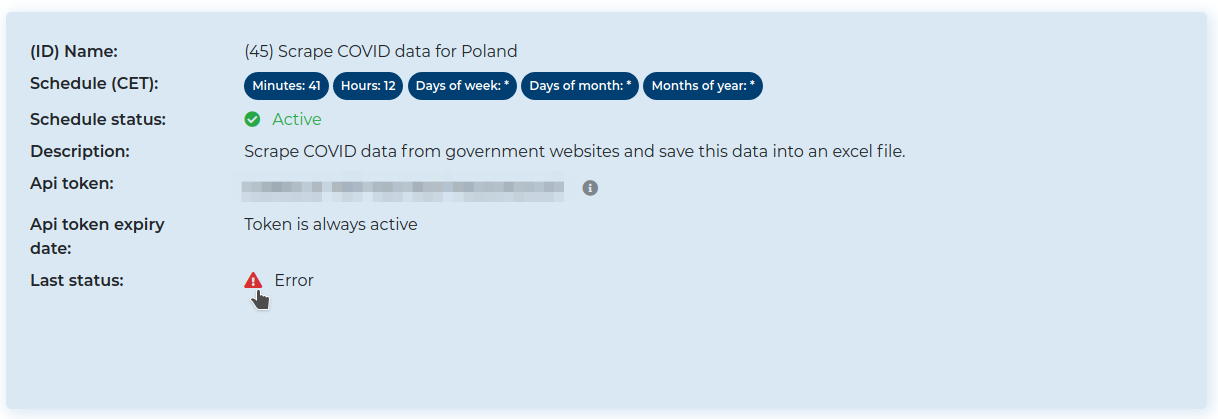

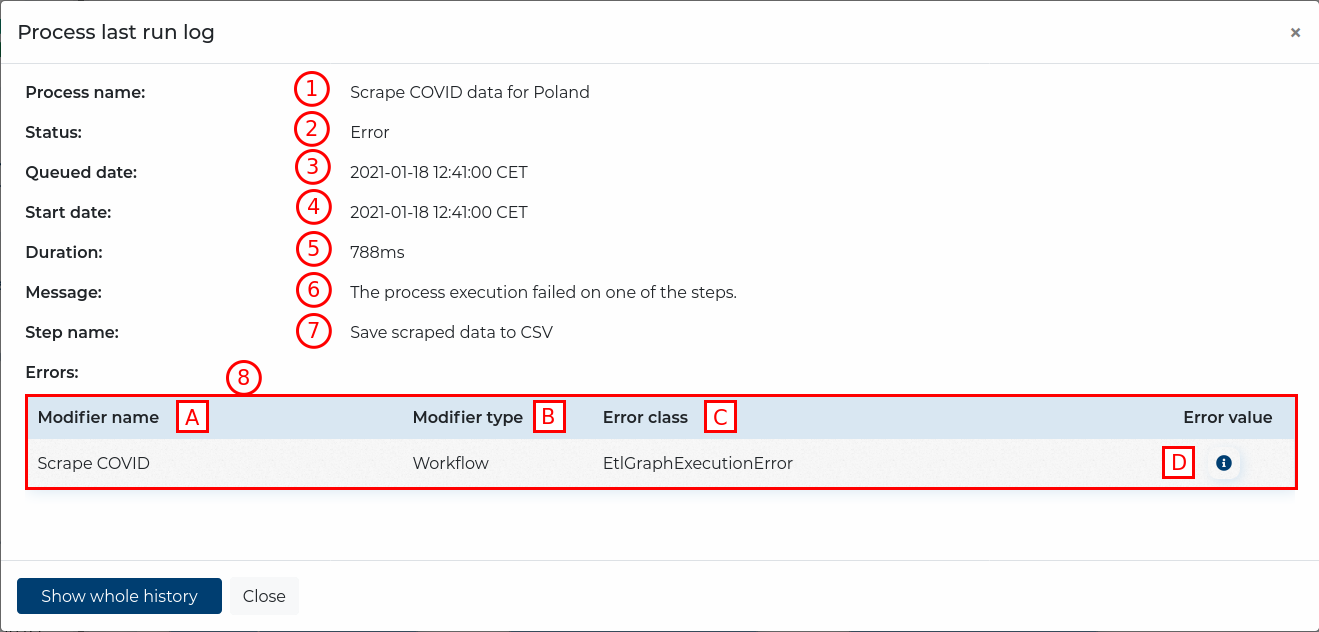
When you click the Status icon, a pop-up window will appear with details of the last Process execution:
- the Process name,
- the Status of the last execution,
- when the Process entered the queue to be run,
- when the Process was started,
- how long the Process has been running; only available if the Process Status
is
SUCCESSorERROR, - a brief message about the error (if there was one),
- the name of the step that caused the error (if there was one),
- details about the error (if there was one):
- (A) the Modifier’s name,
- (B) the Modifier’s type,
- (C) the error’s class,
- (D) a clickable icon that opens the Modifier’s log.
You can access the full Process run history by clicking the Show whole history button.

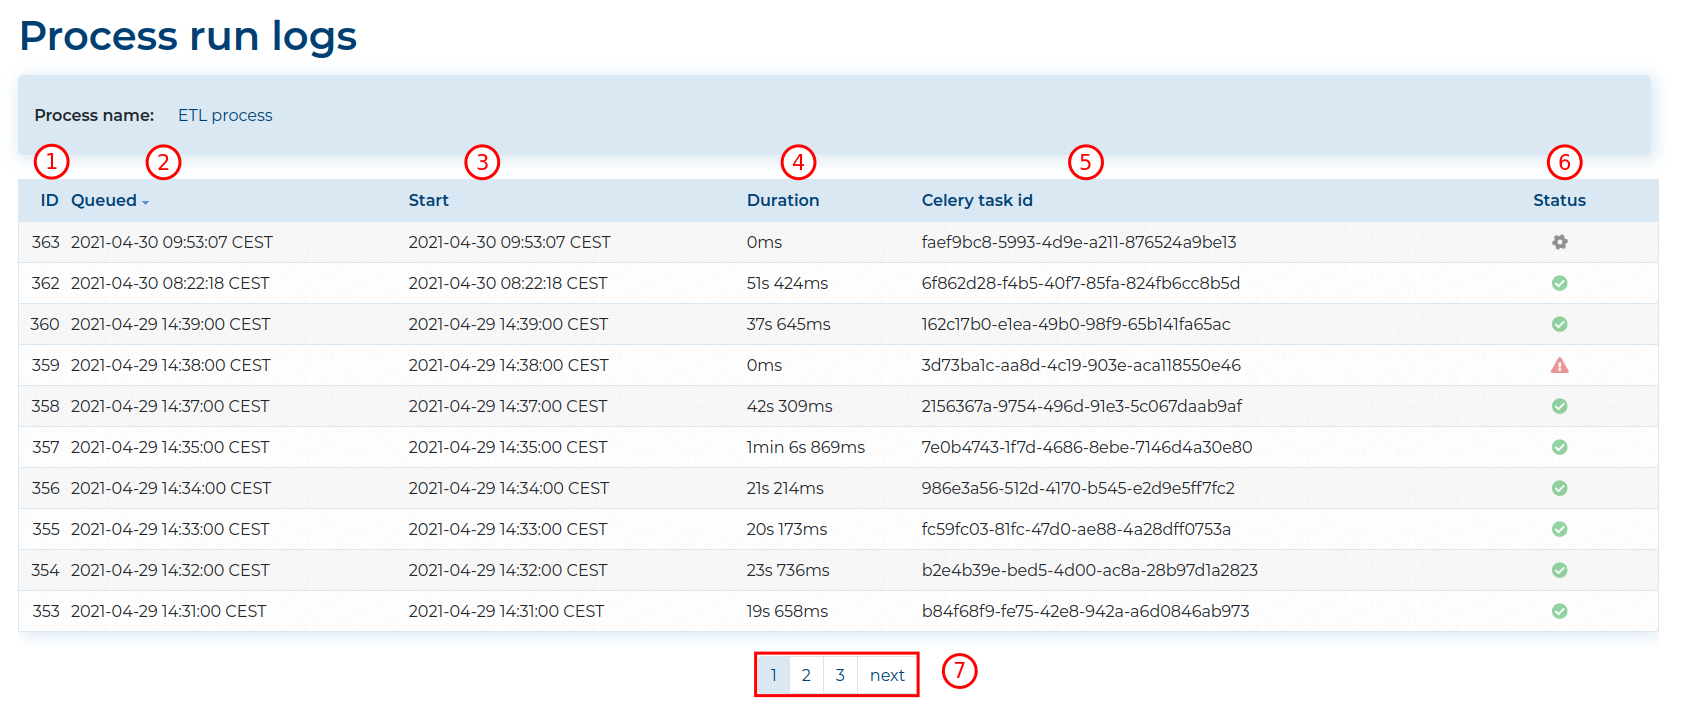
Each element on the list of Process run logs consists of:
- its ID,
- the date it was
Queuedto be run, - its
Startdate, - its duration (only available if the Process Status is
SUCCESSorERROR), - the
Celery task idit refers to, - its Status; click it to view the log details.
At the bottom you will find navigation tools (7) if there are more recorded logs.
