Cleaners #
Cleaners remove data from data targets. They will leave the structure of the data tables, but remove all data from them.
Cleaners first check all connections to all Predefined Targets that should have data tables cleaned. If at least one connection is broken, then none of the chosen data tables will be cleaned. If there is an error while the Cleaner is running, then all data tables which had been ordered before the one that caused the error will be cleaned.
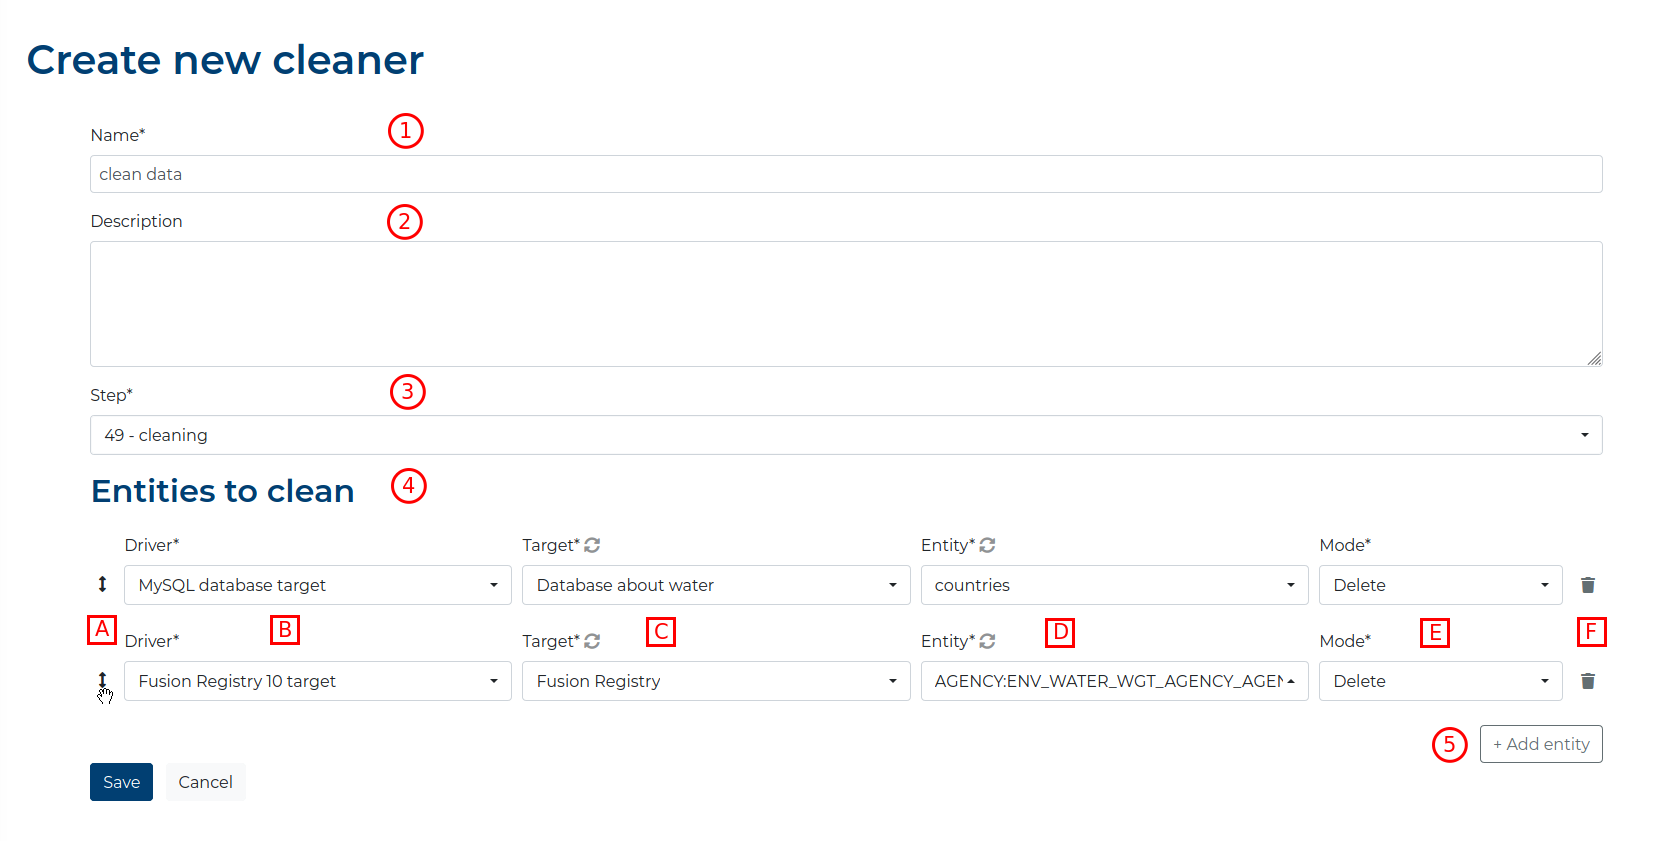
When you create a new Cleaner, a new form will open. You will have to fill in the following fields:
- Name - the name of the Cleaner,
- Description - the description for the Cleaner (Optional),
- Step - the Process Step on which the Cleaner will be run,
- Entities to clean - which data table from the Predefined Target
to clean. You can add many Predefined Target to clean - just add new
ones by clicking the + Add row button (5). Each Row consists of:
 (A) - the icon used to change the order
in which the Predefined Targets will be cleaned; hold the left
mouse button over this icon to drag and drop the row in the chosen order,
(A) - the icon used to change the order
in which the Predefined Targets will be cleaned; hold the left
mouse button over this icon to drag and drop the row in the chosen order,- Driver (B) - the type of target,
- Target (C) - the Predefined Target; press the
 icon to refresh the list of
Predefined Targets,
 - Entity (D) - the table to clean; press the
 icon to refresh the list of entities that can be cleaned in the
Predefined Target,
 - Mode (E) - how to clean the data:
- Delete - use an SQL DELETE statement, used to delete all rows in the chosen database table, leaving the table in the database,
 (F) - button to remove this
particular row from the Entities to clean,
- + Add row - button to add a new row to the Entities to clean.

The Predefined Targets will be cleaned in the chosen order.
Cleaner run logs #
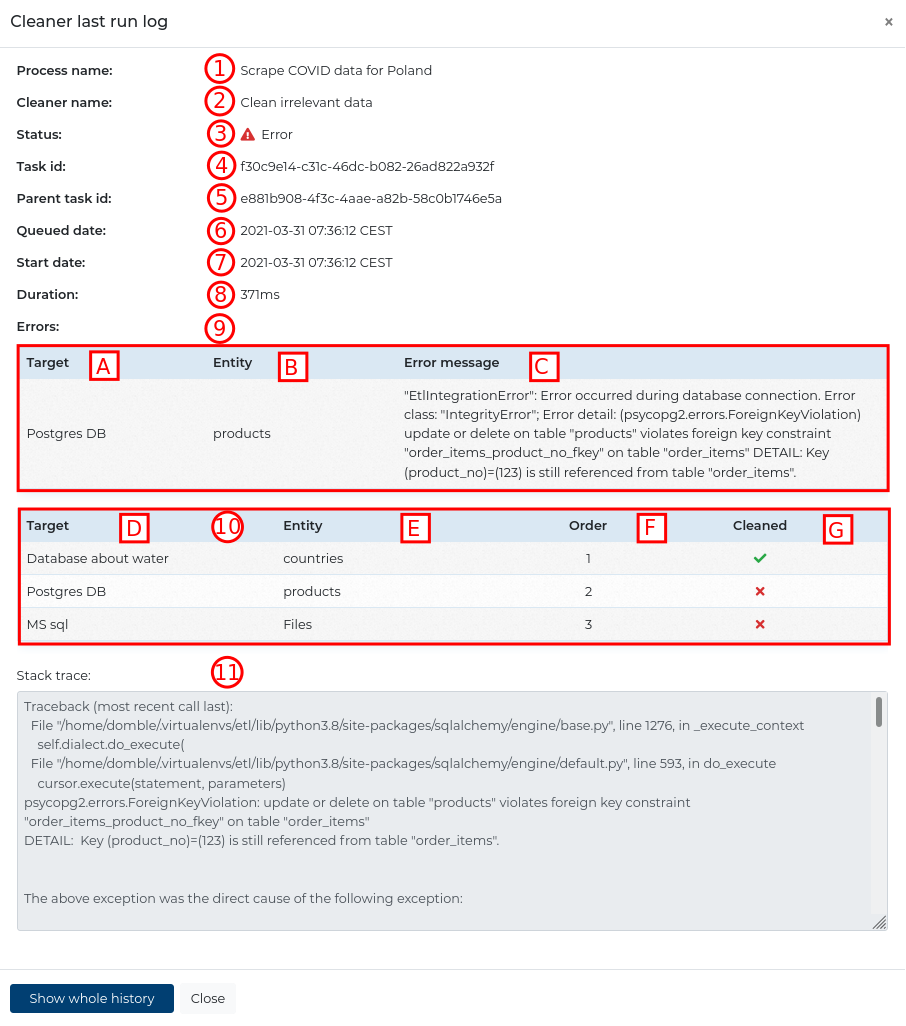
When you click the small Status icon in the upper right corner of the Cleaner, a popup for the Cleaner run log will present details of the latest log entry:
- the name of the Process in which this Cleaner is used,
- the name of this Cleaner,
- the Status of the last execution,
- the Task id ,
- the Parent task id,
- when the Cleaner entered the queue to be run,
- the date this Cleaner was last executed,
- the Duration how long this Cleaner has been running; only available if the Cleaner
Status is
SUCCESSorERROR, - a table of errors that occurred during the execution (if there were any):
- Target (A) - the name of the Target that caused the error,
- Entity (B) - the entity that caused the error,
- Error message (C) - the error message returned,
- a table showing which data tables were cleaned when the error occurred (if there was an
error):
- Target (D) - the target where the data table is,
- Entity (E) - the data table to be cleaned,
- Order (F) - the order in which the data table should be cleaned,
- Cleaned (G) - was the data table cleaned before the error occurred.
- the Stack trace generated by the error (if there was any).

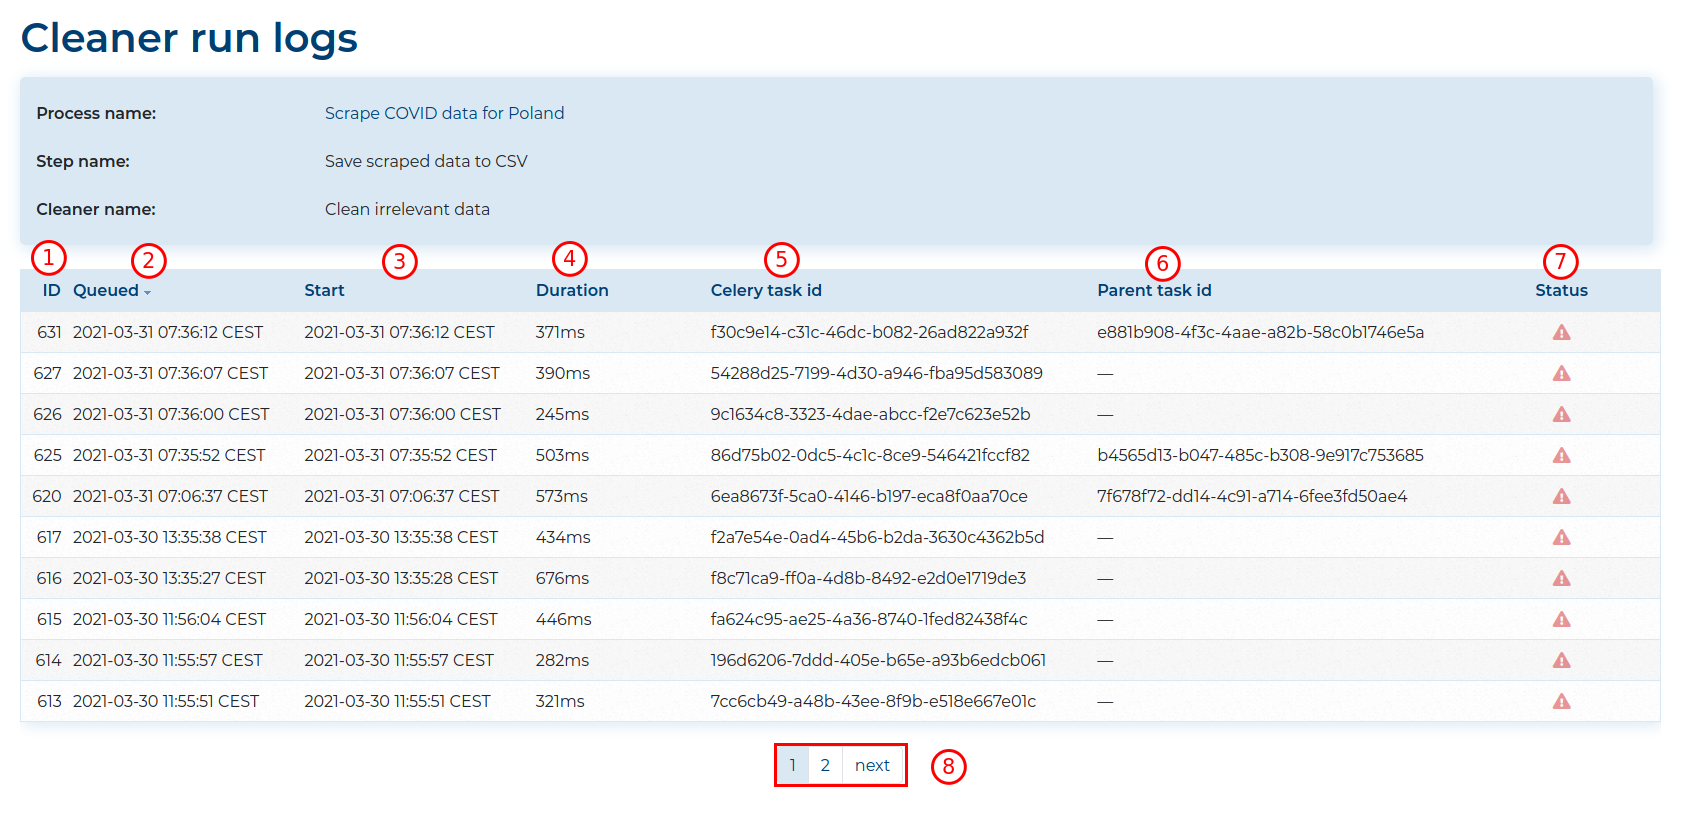
Clicking the Show whole history button will navigate you to the list of all of this Cleaner’s logs. At the top you will see the name of the Process in which this Cleaner is used, the step it is used in and the name of this Cleaner. There you will see a list of all logs of previous Cleaner executions. Each element on the list consists of:
- its ID,
- the date it was queued to be run,
- its start date,
- its duration (only available if the Cleaner Status is
SUCCESSorERROR), - the Celery task id the log refers to,
- the Celery parent task id the log refers to,
- its Status; click it to view the log details.
At the bottom you will find navigation tools (8) if there are more recorded logs.

Export Cleaners #
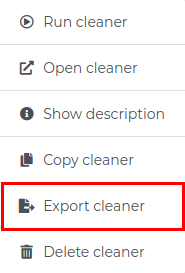
You can export Cleaners by clicking Export Cleaner in the Cleaner actions
(accessible by clicking the ![]() icon on the Cleaner).
icon on the Cleaner).
![]()

This will navigate you to the Export Cleaner section where you need to provide:
- a Filename for the exported Cleaner,
- a Password for the file (Optional),
- additional option whether to include in the exported file the Predefined Data Targets used in the modifier,

All exported Predefined Data Targets include database and usernames as well as passwords!
Only the user with the
predef_target_managementpermissions or theadministrationpermission can include Predefined Targets!
Clicking the Cancel button will return you to the Process details section.
After clicking the Check content button, you will be navigated to a view where you
will see all the Predefined Data Targets that will be
included with the export (if Include predefined targets was checked).
Clicking the Cancel button will return you to the Export Cleaner section.
By clicking the Save button, you will download a file containing the exported Cleaner. The file can be then imported to any Process.