Target Components #
Target Components are the final Nodes in a valid Workflow. They allow you to Load Data to files, databases, Fusion Registry 10 or any other data target by using the Script Target.
Before you can add valid Target Components to the
Workflow, a user with the predef_target_management
Permission needs to
Create a Predefined Target.
When you first drop a Target Component onto the Workspace, a small rectangle will appear with icons representing various available data targets:
 - an Oracle Database table,
 - a PostgreSQL Database table,
 - a MySQL Database table,
 - a
Microsoft SQL Server Database table,
 - a single Sheet from an Excel file,
 - a CSV file,
 - Data from a Fusion Registry 10 Dataflow,
 - a custom script that collects data and converts
it into a Python Pandas DataFrame.
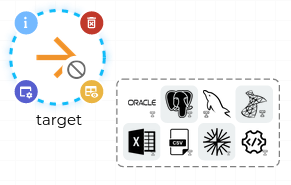
If you do not click any icon, the Node will cause a validation error and you will not be able to open the Preview Data Window on any Node.
When you click any of the icons, it will open a new popup for configuring that specific data target.
Once you select a specific data target from the list, that specific Target Component will only Extract data from that chosen data target. To choose a new data target, you need to remove that Target Component and drop a new one onto the Workspace.
If you do not select any data target, the Node will disappear once you click anywhere on the workspace.
When you click the Minimalize button in the top right corner of the window (circled red), the window will become transparent, allowing you to see the Workspace.
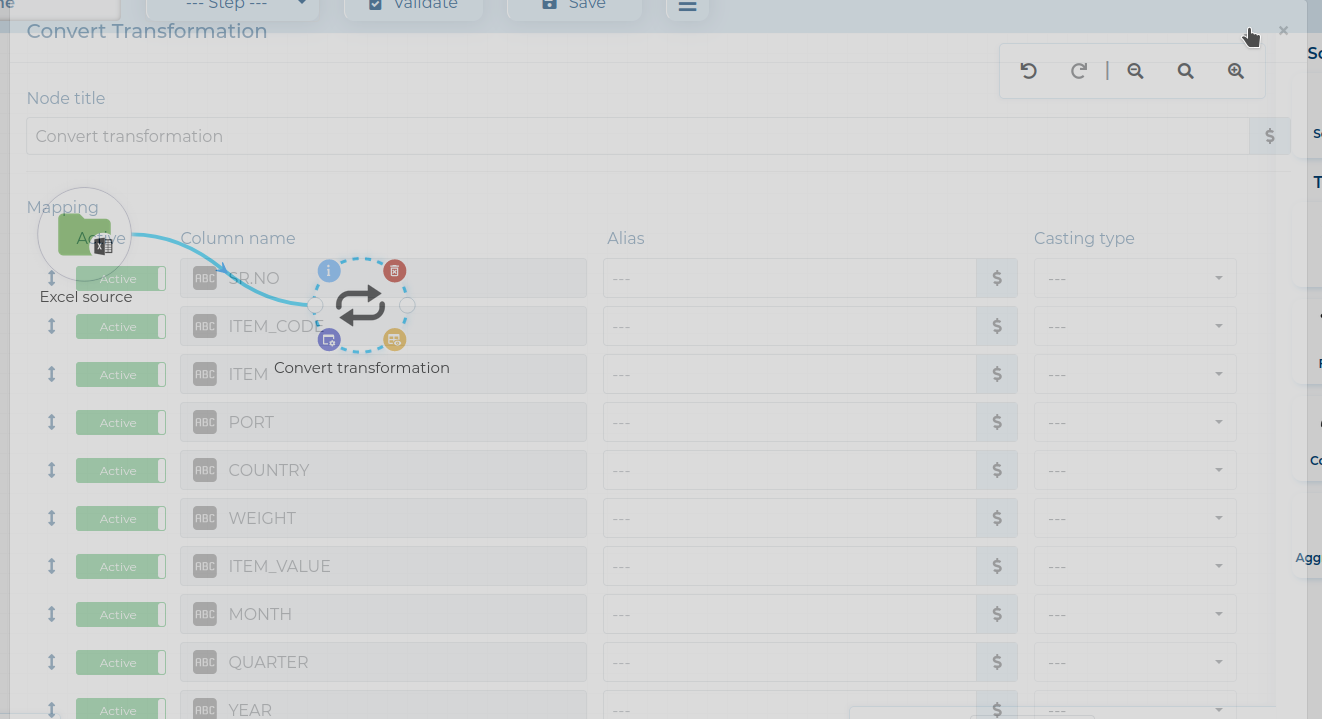
Clicking the Save button will first validate the configuration. If any errors occur, an error message will appear under the field that was not configured correctly. If the configuration is valid, the window will close and you can return to modifying your Workflow.
If you can modify any data in the configuration windows with Process Parameters, a smallicon will be displayed on the left of the field that can be configured by it.
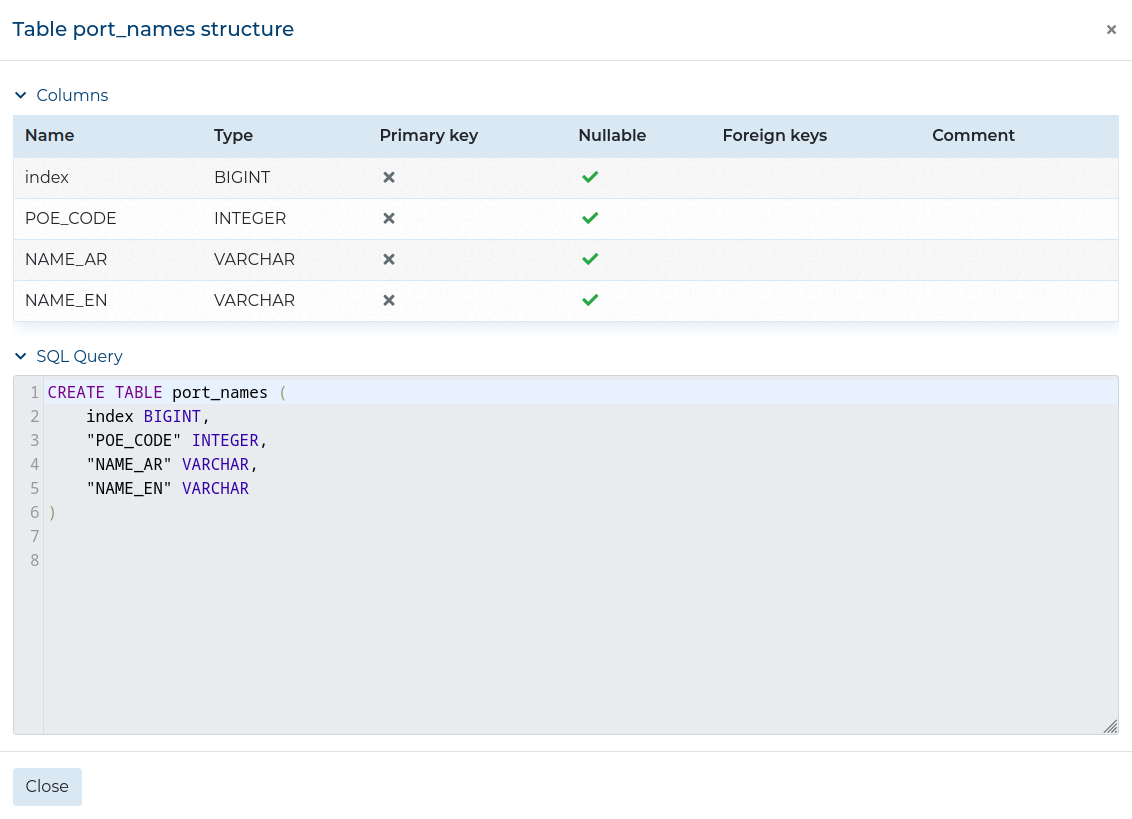
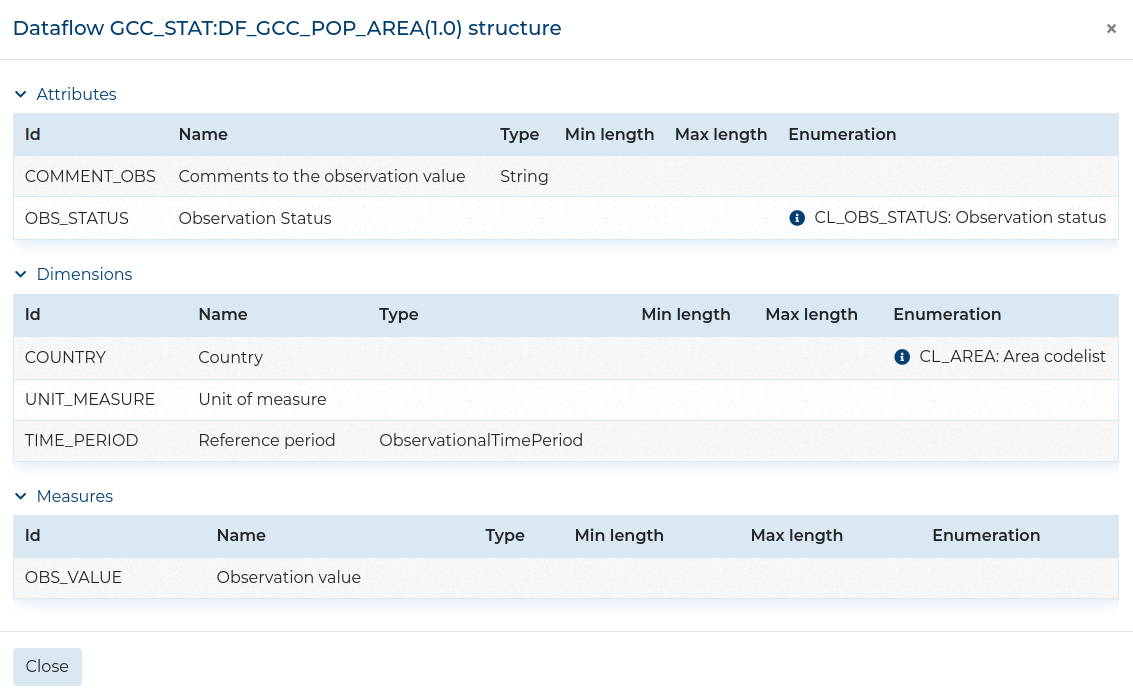
Database targets and the Fusion Registry 10 data target allow you to view the table structure by clicking the Show structure button.
This opens a window showing the structure of the data target.
Examples
Oracle Data Target #
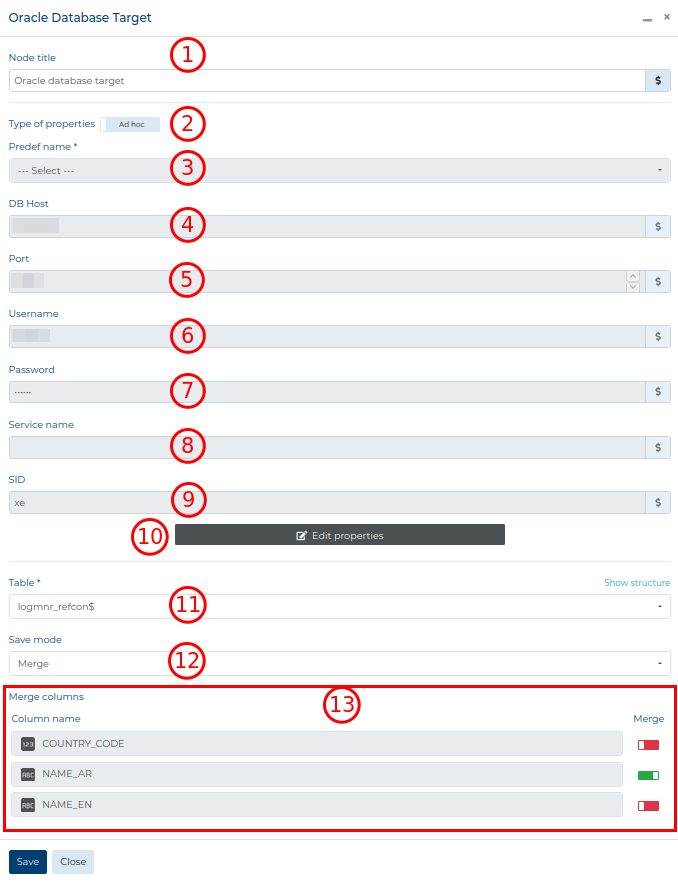
In the configuration window for the Oracle data target, you need to fill out the following fields:
- Node title - the title of this Node that will be displayed on the Workspace and in the Data Preview window (Optional),
- Type of properties - select whether to use one of the Predefined Targets or create an ad hoc target connection,
- Predef name - the name of the Predefined Target; after
selecting one, all the grey fields will be filled out automatically (Required when
Predefinedis selected), - DB Host - the address where the database is located (Required when
Ad hocis selected), - Port - the port of the address (Required when
Ad hocis selected), - Username - the username with access to the database (Required when
Ad hocis selected), - Password - the password needed to access the database (Required when
Ad hocis selected), - Service name - the alias of the database (use either Service name
or SID) (Required when
Ad hocis selected), - SID - the unique name of the database (use either Service name
or SID) (Required when
Ad hocis selected), - Test properties / Edit properties (only visible when
Ad hocis selected) - button to check if the input fields create a valid connection. If the connection is valid, changes to Edit properties which allows changing the above fields, - Table - the table where the data will be Loaded; the table must be present in the Oracle database; you can choose from all detected tables,
- Save mode - how to Load data into the table:
- Merge - modify rows that have values of chosen Merge columns and add the rest as new rows of data,
- Full replace - replace all data in the target table with Loaded data,
- Merge columns (only visible if Merge chosen as Save mode) - the columns to use during the Merge Save; check all columns that apply.
Merge Columns will only be displayed if the Oracle Data Target has input Nodes. You will not be able to configure this Target Component, if you do not connect input Nodes first.
PostgreSQL Data Target #
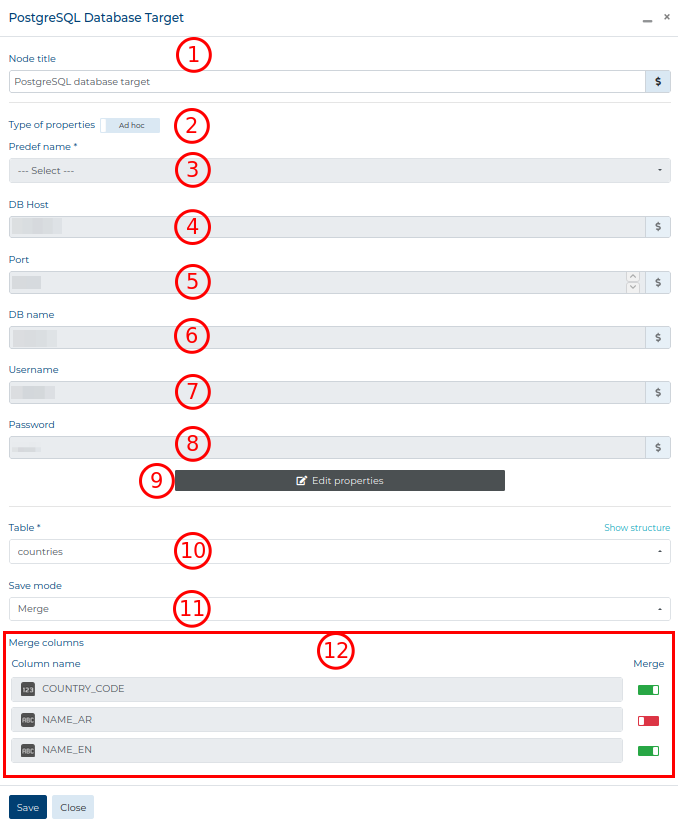
In the configuration window for the PostgreSQL data target, you need to fill out the following fields:
- Node title - the title of this Node that will be displayed on the Workspace and in the Data Preview window (Optional),
- Type of properties - select whether to use one of the Predefined Targets or create an ad hoc target connection,
- Predef name - the name of the Predefined Target; after
selecting one, all the grey fields will be filled out automatically (Required when
Predefinedis selected), - DB Host - the address where the database is located (Required when
Ad hocis selected), - Port - the port of the address (Required when
Ad hocis selected), - DB name - the database that we want to access (Required when
Ad hocis selected), - Username - the username with access to the database (Required when
Ad hocis selected), - Password - the password needed to access the database (Required when
Ad hocis selected), - Test properties / Edit properties (only visible when
Ad hocis selected) - button to check if the input fields create a valid connection. If the connection is valid, changes to Edit properties which allows changing the above fields, - Table - the table where the data will be Loaded; the table must be present in the Oracle database; you can choose from all detected tables,
- Save mode - how to Load data into the table:
- Merge - modify rows that have values of chosen Merge columns and add the rest as new rows of data,
- Full replace - replace all data in the target table with Loaded data,
- Merge columns (only visible if Merge chosen as Save mode) - the columns to use during the Merge Save; check all columns that apply.
Merge Colummns will only be displayed if the Oracle Data Target has input Nodes. You will not be able to configure this Target Component, if you do not connect input Nodes first.
MySQL Data Target #
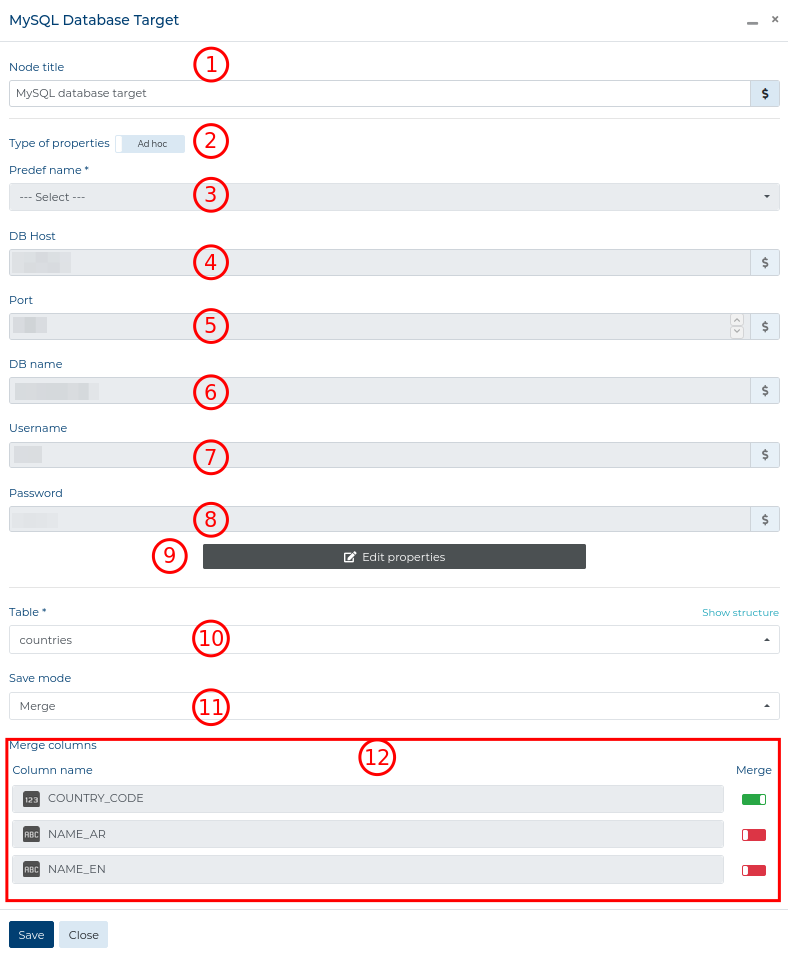
The configuration of the MySQL data target is similar to the PostgreSQL Data Target.
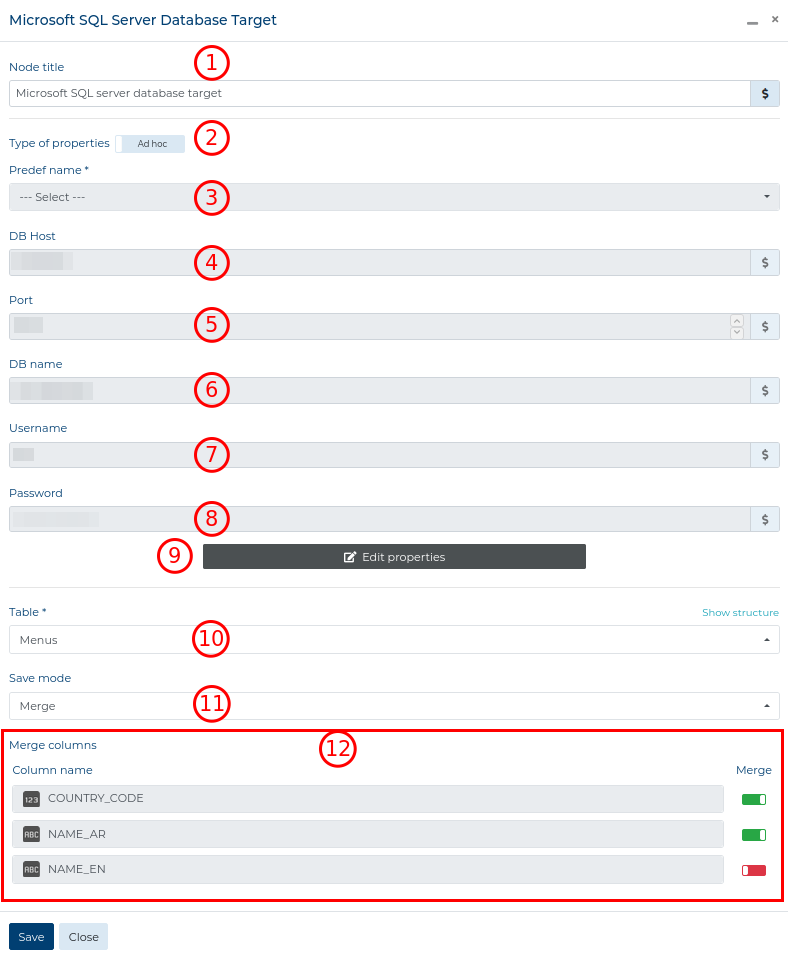
Microsoft SQL Server Data Target #
The configuration of the Microsoft SQL Server data target is similar to the PostgreSQL Data Target.
Fusion Registry 10 Data Target #
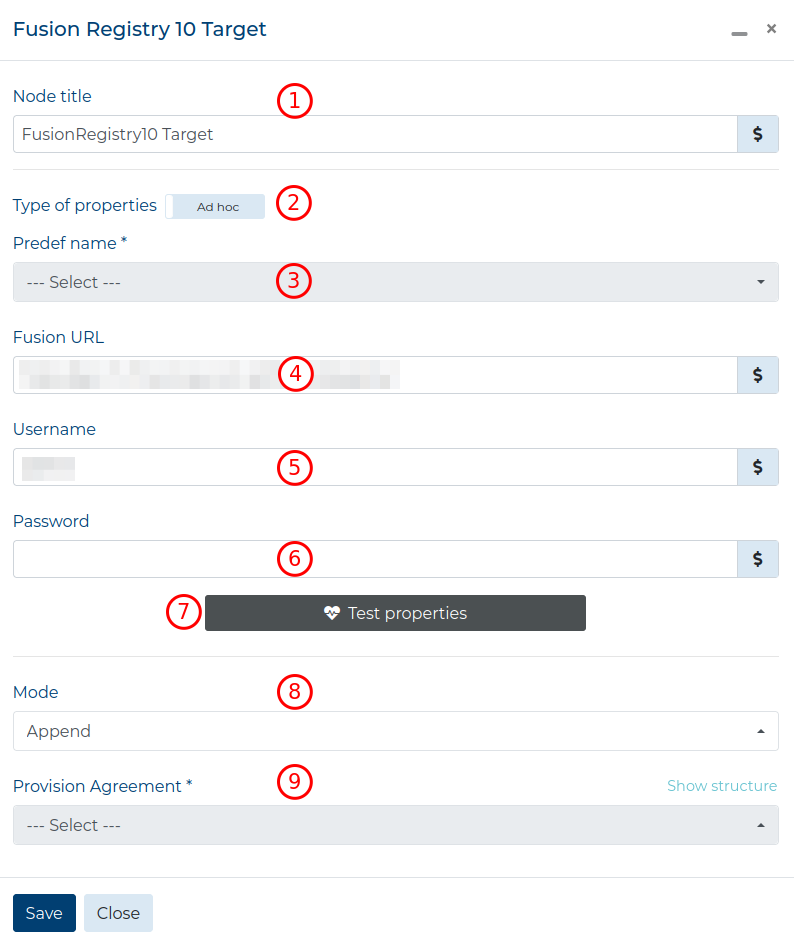
In the configuration window for the Fusion Registry 10 data target, you need to fill out the following fields:
- Node title - the title of this Node that will be displayed on the Workspace and in the Data Preview window (Optional),
- Type of properties - select whether to use one of the Predefined Targets or create an ad hoc target connection,
- Predef name - the name of the Predefined Target; after
selecting one, all the grey fields will be filled out automatically (Required when
Predefinedis selected), - Fusion URL - the URL address of the Fusion Registry instance (Required when
Ad hocis selected), - Username - the username with access to Fusion Registry dataflows (Required when
Ad hocis selected), - Password - the password needed to access Fusion Registry dataflows (Required when
Ad hocis selected), - Test properties / Edit properties (only visible when
Ad hocis selected) - button to check if the input fields create a valid connection. If the connection is valid, changes to Edit properties which allows changing the above fields, - Mode - how to Load data into the Dataflow:
- Append - only insert new data to the Dataflow,
- Replace - update existing data and insert new data to the Dataflow,
- Delete - delete matching data from the Dataflow; the work of this mode depends on data in the Dataflow,
- Dataflow - the Dataflow that the data will be Loaded to.
Script Data Target #
The code in the Predefined Script Target can only be changed by users with the
predef_target_management
Permission.
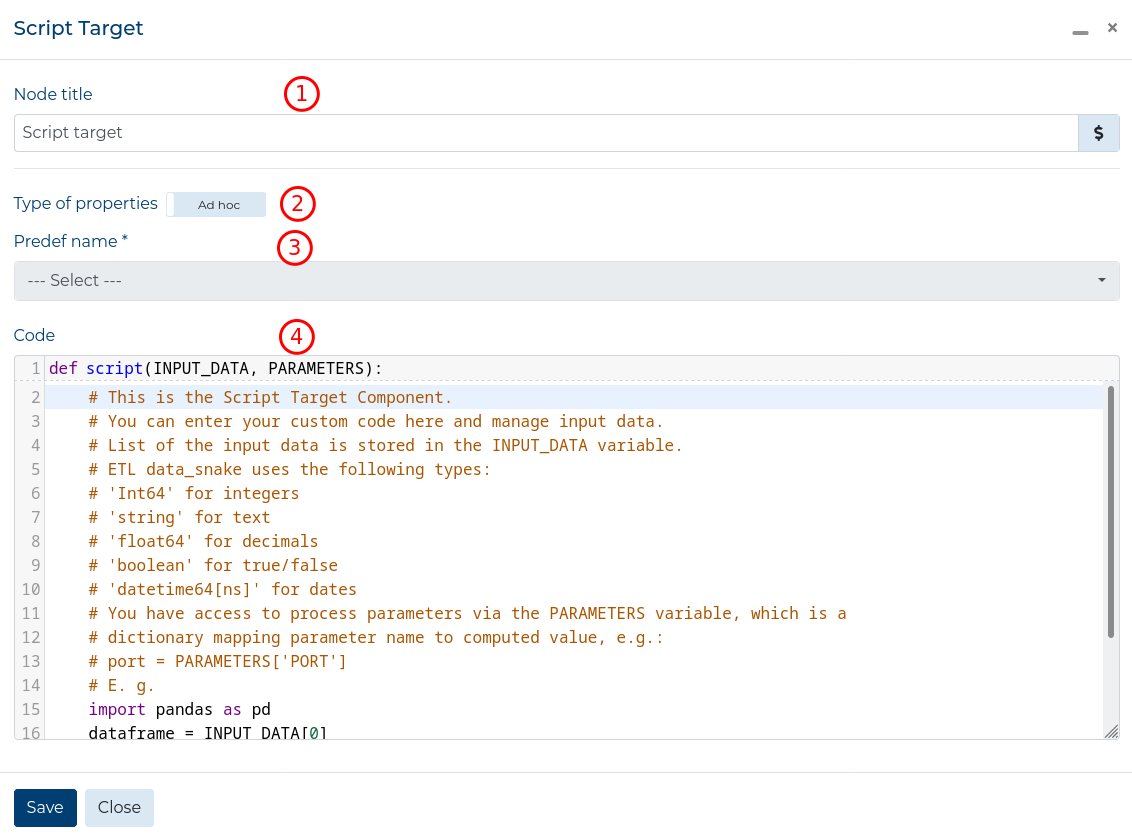
In the configuration window for the Script data target, you need to fill out the following fields:
- Node title - provide the title of this Node that will be displayed on the Workspace and in the Data Preview window (Optional),
- Type of properties - select whether to use one of the Predefined Targets or create an ad hoc target connection,
- Predef name - the name of the Predefined Target; after
selecting one, all the grey fields will be filled out automatically (Required when
Predefinedis selected), - Script code - the code to use for extracting data; it must end with a set
OUTPUT_DATAvariable (Predefined),
File based targets #
The Targets below are uploaded to the Resources of ETL data_snake. If you wish to transfer the created files, you need to download them through the Resources section.
Excel Data Target #
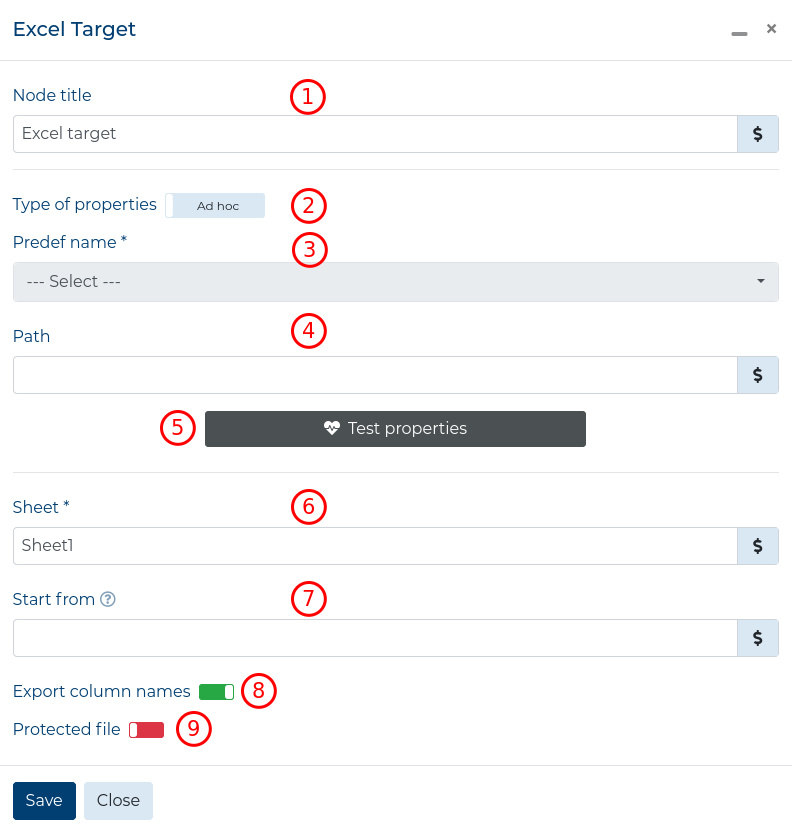
In the configuration window for the Excel data target, you need to fill out the following fields:
- Node title - the title of this Node that will be displayed on the Workspace and in the Data Preview window (Optional),
- Type of properties - select whether to use one of the Predefined Targets or create an ad hoc target connection,
- Predef name - the name of the Predefined Target; after
selecting one, all the grey fields will be filled out automatically (Required when
Predefinedis selected), - Path - the filepath in the Resources folder (Required when
Ad hocis selected). If you specify a path that doesn’t exist, the directories will be automatically created, - Test properties / Edit properties (only visible when
Ad hocis selected) - button to check if the inputed fields point to a valid file. If the file is valid, changes to Edit properties which allows changing the above fields, - Sheet - the name of the excel sheet to use; if you choose an existing name, data will be replaced with the Loaded data; if there is no such name in the Excel file, a new one will be created,
- Start from - the cell from which to start Loading data to the Excel file; leaving
this field blank will load data from the first cell (e.g.
A1); only use capital letters and integers for cell address, - Export column names - whether to Load column names to the Excel sheet; if toggled off, only data will be Loaded to the Excel sheet;
- Protected File - whether to rewrite the file if it exists; enabling this will cause that no new data will be written to an existing file, even if to a different Excel sheet.
CSV Data Target #
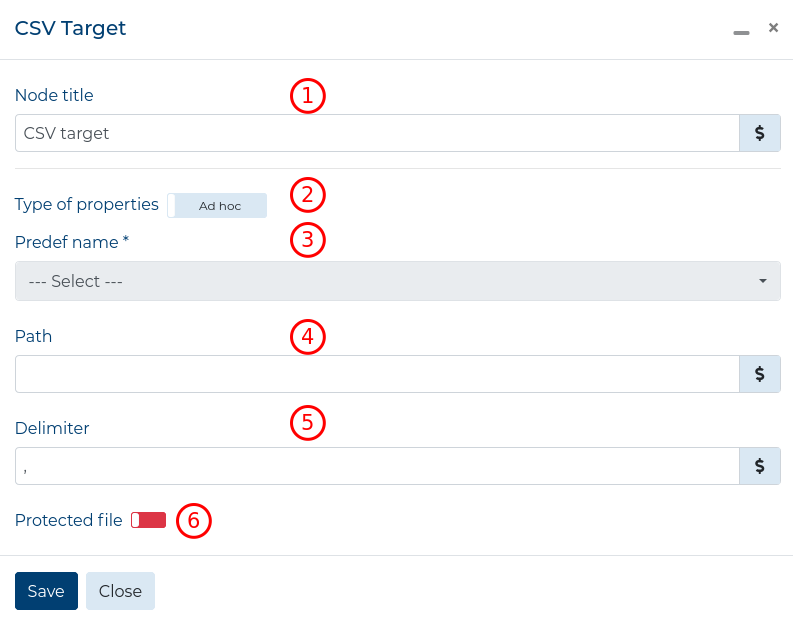
In the configuration window for the CSV data target, you need to fill out the following fields:
- Node title - the title of this Node that will be displayed on the Workspace and in the Data Preview window (Optional),
- Type of properties - select whether to use one of the Predefined Targets or create an ad hoc target connection,
- Predef name - the name of the Predefined Target; after
selecting one, all the grey fields will be filled out automatically (Required when
Predefinedis selected), - Path - the filepath in the Resources folder (Required when
Ad hocis selected). If you specify a path that doesn’t exist, the directories will be automatically created, - Delimiter - symbol used to divide the values in the CSV file (Required when
Ad hocis selected), - Protected File - whether to rewrite the file if it exists;
